
DIY Dog Agility: Create an Exciting Course for Your Furry Friend
Introduction
Dog agility is more than just a sport; it’s an enriching activity that challenges your furry friend both mentally and physically. Imagine your dog’s delight as they weave through obstacles, jump over hurdles, and navigate tunnels—all crafted with love and creativity by you! If you’re looking for a fun project to bond with your pet, setting up a DIY dog agility course could be the perfect solution. In this comprehensive guide, we’ll walk you through everything you need to know, from basic setup to advanced techniques, ensuring you and your dog have a blast.
DIY Dog Agility
Creating a DIY dog agility course isn’t as daunting as it sounds. With a bit of planning and some everyday materials, you can transform your backyard into a playground for your pup. Whether you’re a seasoned agility trainer or a newbie, this guide will help you build a course that suits your dog’s size, skill level, and energy.
What Is DIY Dog Agility?
DIY dog agility involves constructing your own agility equipment and setting up an obstacle course at home. Unlike commercial agility courses that can be expensive, a DIY approach allows you to customize the course according to your dog’s needs and your budget. From jumps and tunnels to weave poles and seesaws, you can create a variety of challenges that will keep your dog engaged and fit.
Benefits of DIY Dog Agility
Setting up a DIY course has numerous advantages:
- Cost-Effective: Save money by using materials you already have or can find cheaply.
- Customizable: Tailor the course to your dog’s size and skill level.
- Bonding Time: Spend quality time with your pet while training and playing.
- Health Benefits: Improve your dog’s fitness, coordination, and obedience.
With these benefits in mind, let’s dive into how you can start building your very own DIY dog agility course.
Choosing the Right Space
Indoor vs. Outdoor Agility Courses
When planning your DIY dog agility course, deciding whether to set it up indoors or outdoors is crucial. Each option has its benefits:
- Indoor Courses: Great for year-round training, especially during bad weather. Ensure you have ample space and a non-slippery floor.
- Outdoor Courses: Offers more space and a natural environment. Choose a flat, open area free from hazards.
Safety Considerations
No matter where you set up, safety is paramount:
- Surface: Use soft, non-slip surfaces to prevent injuries.
- Obstacles: Ensure all equipment is stable and securely anchored.
- Supervision: Always supervise your dog while they’re navigating the course.
Basic Agility Equipment
DIY Jumps
One of the simplest and most versatile agility obstacles is the jump. You can easily make jumps using PVC pipes or wooden planks. Here’s a quick guide to creating a basic jump:
- Materials: PVC pipes or wooden planks, connectors or supports.
- Instructions: Cut the pipes or planks to your desired length, assemble the frame, and set the height according to your dog’s size.
Tunnels
Tunnels are fantastic for developing your dog’s confidence and agility. You can use a collapsible children’s play tunnel or make one with fabric and PVC pipes. Here’s how:
- Materials: A play tunnel or fabric, PVC pipes (if making your own).
- Instructions: If using fabric, create a tube shape and secure it with fabric ties. For PVC, assemble a tunnel frame and cover it with a stretchy fabric.
Weave Poles
Weave poles help improve your dog’s agility and coordination. Create a set using PVC pipes:
- Materials: PVC pipes, stakes or anchors.
- Instructions: Cut the pipes to a uniform length and secure them in a line, spaced appropriately for your dog’s size.
Advanced Agility Obstacles
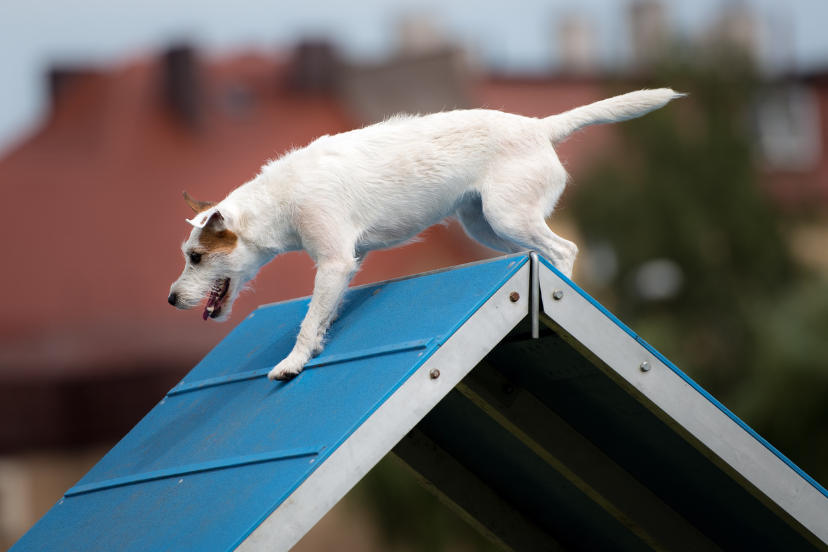
A-Frames
An A-frame is a classic agility obstacle that challenges your dog to climb and descend a sloped surface. To build one:
- Materials: Plywood, hinges, supports.
- Instructions: Cut the plywood into two triangular pieces, attach them with hinges to create the A-frame, and secure it with supports.
Seesaws
Seesaws teach balance and coordination. To create a seesaw:
- Materials: A long board, a sturdy base (like a barrel or a wooden block).
- Instructions: Attach the board to the base in the center, ensuring it can tilt smoothly.
Pause Tables
Pause tables are used to teach dogs to stop and stay. To make one:
- Materials: A sturdy platform or table.
- Instructions: Ensure the table is low to the ground and stable, and train your dog to jump on and stay.
Training Your Dog on the Course
Introduction to Obstacles
Start with basic training:
- Introduce Each Obstacle: Let your dog explore each one individually.
- Positive Reinforcement: Use treats and praise to encourage your dog.
Creating a Routine
Once your dog is comfortable with each obstacle, create a routine:
- Start Small: Combine a few obstacles at a time.
- Increase Difficulty: Gradually add more obstacles and increase the complexity.
Troubleshooting Common Issues
If your dog struggles, try:
- Revisiting Basic Training: Ensure they’re comfortable with each obstacle.
- Adjusting Heights or Angles: Modify the course to suit their skill level.
Maintaining the Course
Regular Checks
Inspect your course regularly for:
- Wear and Tear: Replace or repair any damaged equipment.
- Safety Hazards: Ensure there are no sharp edges or unstable parts.
Cleaning and Storage
Keep the course clean:
- Outdoor Courses: Clean up debris and check for weather damage.
- Indoor Courses: Dust and sanitize equipment as needed.
Benefits of DIY Dog Agility
Physical Health
A well-designed agility course keeps your dog fit:
- Exercise: Promotes cardiovascular health.
- Coordination: Improves balance and muscle tone.
Mental Stimulation
Agility training also benefits your dog’s mind:
- Problem-Solving: Challenges their problem-solving skills.
- Focus: Enhances their attention and responsiveness.
Bonding and Fun
Lastly, agility training strengthens your bond:
- Quality Time: Enjoy fun and rewarding sessions together.
- Accomplishments: Celebrate your dog’s progress and achievements.
FAQs
1. How do I start building a DIY dog agility course?
Begin by selecting a suitable space, choosing the right obstacles, and assembling basic equipment like jumps and tunnels. Gradually introduce your dog to each obstacle and create a routine.
2. What materials do I need for DIY agility equipment?
Common materials include PVC pipes, wooden planks, fabric, and plywood. You might also need connectors, hinges, and supports.
3. Can I build agility equipment with items I have at home?
Absolutely! Many DIY agility enthusiasts use household items like broomsticks for jumps or laundry baskets for tunnels.
4. How can I ensure my dog’s safety on the agility course?
Ensure all equipment is stable, use non-slip surfaces, and always supervise your dog. Regularly inspect and maintain the course to prevent accidents.
5. What if my dog is scared of some obstacles?
Start with basic training and gradually introduce each obstacle. Use positive reinforcement to build confidence and comfort.
6. How often should I train my dog on the agility course?
Consistency is key. Aim for short, regular sessions—around 15-30 minutes a few times a week—to keep your dog engaged and progressing.
Conclusion
Setting up a DIY dog agility course is a rewarding endeavor that benefits both you and your canine companion. By creating a fun, challenging environment, you not only keep your dog active and healthy but also strengthen your bond through play and training. Whether you’re building jumps, tunnels, or weave poles, remember that patience and creativity are your best tools. Enjoy the process, celebrate your dog’s achievements, and most importantly, have fun together!
So, grab those tools and get started on your DIY adventure—your dog will thank you with wagging tails and happy barks!


